
How to winter-proof your bike


How to prepare your bike for winter
There are lots of things to love about cycling in winter – hot chocolate bakery stops, post-ride warm showers, early morning fog that transforms the Parklands into a misty wonderland – but there can also be downsides, such as the bike-destroying power of grime and mud, not to mentioned decreased visibility and soggy clothes.
As a result, even a hardcore bike rider can be tempted to stick their bicycle in the shed and wait until spring returns. But there’s no need. With some simple steps, you still can ride in the rain and cold, and minimise any wet-weather damage.
We’re going show you 6 easy ways to winter-proof your bike, including how to stop water getting inside your frame, how to keep your bike—and yourself—clean, and how to stay safe, even in terrible weather.
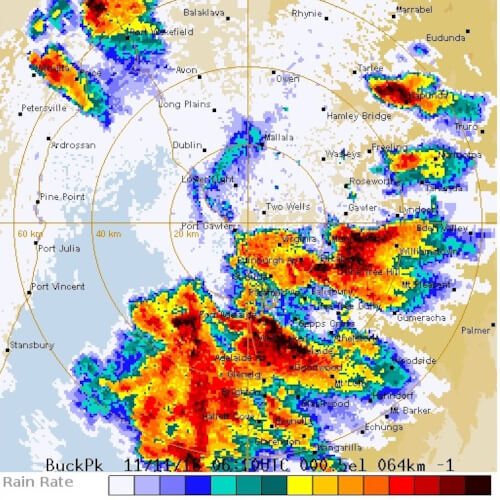
So let’s get ready to keep cycling in cold weather, even if the BOM radar looks like this:
Winter-proofing 1: Keep water out of your frame
Water: great for humans, terrible for bicycles.
If it gets inside your frame, water can be a bike-destroyer.
Why is water ingress bad for frames?
The main reason is because water works its way into bearings and rusts them out.
Rusted components will usually become seized components: handlebars can’t turn, wheels don’t spin properly, pedalling becomes harder, and your dual-suspension MTB pivots don't work (congrats you now have a hardtail).
For steel-framed bikes, though, there’s a bigger danger: rust will literally chew holes in a frame. Once this happens, it's time for a new bike.

"Hold on,” you might think. “I don’t ride through rivers. Of course my frame doesn’t have water in it.”
If you’ve been cycling in wet weather, there’s a very good chance you’re wrong. It’s very easy for rain or road splash-back to get sucked into nooks and crannies, and then make its way inside your frame.

We frequently pull cranks out during a service and discover moisture inside the bottom bracket shell. The amount of water varies – sometimes it’s a few drops, sometimes it’s a miniature lake like in the picture below – but no amount is good.
Some frame designs are also oddly susceptible to it, even if they have large drainage holes.

How to Prevent Water Getting Into Your Frame
1. When cleaning your bike (more on that in a moment), if you're using a hose, be very gentle. Don’t blast away at your frame, no matter how tempting it is to jet-clean the crud off. Strong water pressure will force water past seals and grease, and inside your frame. You might see pro mechanics blasting the hell out of the race team bikes, but remember: teams get given their bikes, and those bikes are basically considered to be disposable items.
2. Bike frames often have rubber grommets and seals in areas such as cable entry points or where the seat post enters. Check these areas to make sure that that the stoppers are intact and doing their job. If they’re looking tired, cracked, brittle or just not fitting properly, replace them. A piece of old bicycle tube slipped over your seat post slot will help keep a lot of gunk out, too.

3. Make sure your bike gets an annual post-winter service to clean out any water or grime that may have worked its way inside, and to refresh the protective greases that help seal the frame off. If your bike is steel, this is also a good time to find out if it has an internal coating, and have one applied if it doesn't.
4. Finally, if you can avoid riding in a downpour, or at least wait until it eases off a bit, do so.

Winter-proofing 2: Make Use of Mud Guards
Mud guards don’t just help protect you and your clothes from road spray and mud; they also help protect your bike.
What mud guards are best for winter?
The best mudguards for winter are a set of full-length ones which cover the wheels front and rear, such as SKS guards. They'll stop spray coming up from the front wheel towards your bottom bracket and down tube, and the rear will make sure you're not walking into the office with a big brown stripe up your back.
While full-length guards are best, you'll need two things to install them:
- Mud guard mounting points on your frame
- A degree of mechanical aptitude (or a good mechanic)
If your frame has no mounting points or you can't face wrestling with nuts and bolts, go for a clip-on style of mud guard instead. This style of guard is also handy if you're wanting to only run them in winter; with far less faffing-around, they're easier to whip off when the weather warms up again.
Lightweight clip-in guards such as Ass Savers are easy to fit, but they're really just designed to minimise road spray. They're not going to do much when it comes to protecting your bike, or you if you're riding off-road.

Winter-proofing 3: Clean Your Bike Regularly
Winter muck is dirty, sure, but what’s worse is what’s inside the muck: gritty particles.
These particles mix with water and act like a metal-shredding cutting paste, prematurely wearing down anything they touch: your chain, chain rings, cogs, jockey wheels, brake pads, rotors and rims.
The best way to ensure overall longevity of your bike components is keeping your bike clean. Trust us, it'll save you a lot of money in the long run.

How to keep your bike clean in winter
Here are three routines, from perfect to 'eh'. Pick your poison. You know what kind of person you are.
Ideal routine:
- Before the winter weather sets in, prep your frame with a protective coating, such as a silicon spray. It acts like a Teflon coating, and makes cleaning much easier – muck just slides off.
- After each wet/muddy ride, gently (GENTLY) hose off your bike to get rid of the worst of the dirt and grime, and to stop mud from hardening into place. Wipe your chain with a rag, and re-lube.
- Each month, do a proper clean, including degreasing the drivetrain. Don’t forget to check the tyres for cuts and glass.
Basic routine:
- After each wet/muddy ride: wipe your chain with a rag and re-lube it.
- Do this weekly, even if you haven’t been cycling in the wet.
Can’t-be-arsed routine:
- Keep riding until the noise from your drivetrain eventually forces you to go to a bike shop.
- Recoil in horror when they tell you that you now need a new...everything.

If you only ride on a trainer in winter
Sitting on a stationary bike and thinking none of this applies to you? Incorrect!
A side effect of days spent sweating away on your trainer is what's left behind when that sweat dries: salt.
Like water, salt is a corrosive agent. It will eat anything metal on your bike – bars, stem, bearings, bolts, frame.
How to prevent sweat ruining your bike
The good news is that this one's super-easy.
- Keep a towel over your sweat zones.
- Wipe down your frame after each training session.
Ta-da!
If nothing else, do it to avoid subjecting your long-suffering bike mechanic to this:

Winter-proofing 4: Keep your chain lubed
After cleaning, chain lube is the second most critical area of bike maintenance, and it's especially important in the winter: wet weather washes lube out, so it needs to be reapplied more often.
A good lube will help protect your chain and drivetrain from grit and gunk. Your components will not only work better but also last longer so you don't have to fork out cash for new ones so often.
Your bike also won’t sound like a bag of hammers.

What kind of lube should I use in winter?
There are four main kinds of lube:
- Wet
- Dry
- Drip-on wax
- Immersion wax
The difference between wet and dry lube is the amount of lubricant they contain in relation to their carrier fluid – a dry lube has a small ratio of lubricant to carrier fluid, a wet lube has more.
A wet lube has the advantage of staying on the chain longer, and will last better through showery weather.
Wet lube viscosity varies from brand to brand – some run relatively cleanly, whereas others seem to attract every speck of dirt and end up in a gooey mess (which can be made worse if you over-lube the chain in a well-meaning attempt to look after your drivetrain).

As dry lubes aren’t as thick and sticky, they don’t attract grit the way a wet lube can. On the downside, they don’t last as long – all it takes is one rainy ride to flush them out.
Drip-on wax-based lubricants run cleanly and don’t suffer the same gumming-up issues that wet lubes can. However, like dry lubes, they need to be applied more frequently. If you’re a can’t-be-bothered kind of rider, they’re probably not the one for you.
We’ve spoken at length about immersion-style waxed chains before, but even they need to be attended to after a wet weather ride; rust can be an issue.

Can I use WD-40 on my bike chain?
WD-40 is often cited as a chain lube but it doesn’t really contain enough lubrication to properly protect your chain. However, it will degrease the hell out of it. Which... we guess makes it an anti-lube.
Despite what Reddit/weightweenies/mtbr might tell you, you can’t just slop anything on your bike chain – you need a lube that’s fit for purpose. That means no sewing machine oil, olive oil, bearing grease, Vaseline, or that tube of mysterious goo you found in the shed.
We also don’t recommend using spray-on lubes; it’s far too easy to contaminate your brake pads or rotors with overspray, which leads to a whole host of other problems.

What’s the best way to lube your chain in winter?
- Start with a nice clean chain.
- Lean your bike against a wall or bench so the cranks can spin freely.
- Shake up your lube, then start turning the pedals/cranks backwards.
- Release the lube in steady, thin stream on the chain where it runs over the teeth of the cassette (rear cogs).
- Keep lubing until you can see a thin film, then stop.
- Turn the cranks a few more times to help it distribute.
For drip-on wax-based lubes, lube your chain the night before, so the lube can settle on the chain and dry out properly to protect it.
How often do I need to lube my chain in winter?
As a general rule, after a rainy ride, wipe your chain down and re-lube it.
Keep a bottle and rag close by where you stash your bike so it’s easy to do – it only takes a moment.

Winter-proofing 5: Keep an eye on your brakes
Winter grime isn’t just a nightmare for your chain – it’s bad news for your brakes, too.
When caught between pads and rims or rotors, grit will happily sandpaper these surfaces down to nothing until one day you hit the brakes and don’t stop.

How to make your brake pads last longer in winter
It’s simple: clean them.
A quick wipe-down of your pads and rims/rotors after each ride will help remove dirt and grit and stop them forming into a pad-destroying paste.
If you’ve got disc brakes, you could also switch to a more durable metallic brake pad compound. (The trade-off is that they tend to squeal like a bastard.)
It's also a good idea to check your brake pads regularly. Here’s how to do it, including how to spot signs of uneven wear.

Winter-proofing 6: Stay visible
Ah, the eternal struggle between bike riders trying not to die and drivers trying not to spill their coffee.
We are already often invisible at the best of times to motorists. In wet or gloomy weather, however, this problem is much worse.
Rain, fog and low light conditions will naturally make you harder to see, and we all know that as soon as there's a drop of rain, everyone forgets how to operate a steering wheel.
Get ahead by making yourself as easy to spot as possible.
What bike lights are best for winter cycling?
Look for high-quality options which offer around 400-800 lumens for the front and 50 lumens for the back to ensure maximum visibility. On a headlight, this lumen level will let you see potholes and other obstacles but it isn't so bright that you end up blinding oncoming traffic.
If your lights have side cut-outs or windows so they can be seen from other angles, that’s even better.
A word of caution: double-check the flash pattern. Some lights have a long gap between flashes, which can be enough to render you invisible if a driver glances over at the wrong time. Look for lights with a near-constant flash or pulse option.

What clothing is best for winter cycling?
While black kit is the choice of many a style-conscious rider, it’s not the best choice for low-light riding. (Sorry, dear goth friends.)
Instead, go for light colours with reflective elements.
This goes for helmets as well; a white helmet is instantly easier to spot than a dark one, especially as it's closer in height to a driver's eyeline.
Finally, ride defensively
When dealing with other road users, the best way to avoid trouble is to assume that they haven’t noticed you.
You honestly don’t need to ride as if everyone’s trying to kill you, as that kind of stress doesn't help anyone. Just be aware of what’s happening around you, stay calm, and be cautious.
Be particularly alert when riding past parked or stationery cars. Keep an eye on the driver's side door, and ride in a position where you’re out of harms’ way if someone decides to fling it open without looking.
Overall, the more visible you are, the less chance someone will use their car to surprise-hug you.

Conclusion: Don’t Hibernate—Winter-Proof and Ride On
Winter cycling doesn’t have to mean trashed bikes and public-transport-induced despair. With some frame prep, gentle cleaning, smart lube choices, solid mud guards, and a good light setup, you can ride through the worst the weather throws at you and still arrive smiling (or smug, at least).
And remember, the more on top of your bike maintenance you are, the less you'll pay for it later – literally.
So don’t stash your bike in the shed just yet.
There's always a warm shower and a hot chocolate waiting somewhere for you.
Can't be bothered doing any of the bike-related stuff? We can do it for you.


